Game Boy Chiptune Guide: Recreate the 4-Channel Sound in UltraBox
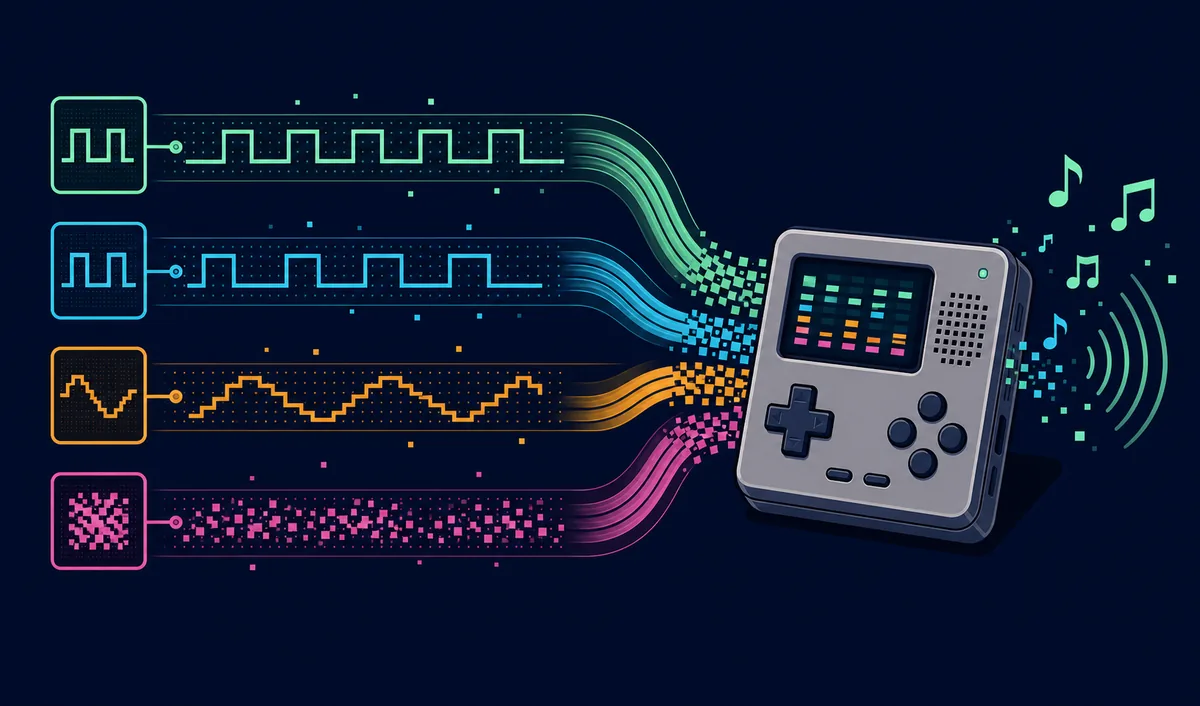
Game Boy chiptune is built around four disciplined sound roles: two pulse channels, one programmable wave channel, and one noise channel. In UltraBox, the fastest way to capture that character is to assign one musical job to each lane, keep effects restrained, and write the hook before adding modern layers. This guide gives you a practical four-channel template rather than pretending UltraBox is a cycle-accurate Game Boy emulator.
In This Guide
The Short Answer: Use Four Jobs, Not Four Random Presets
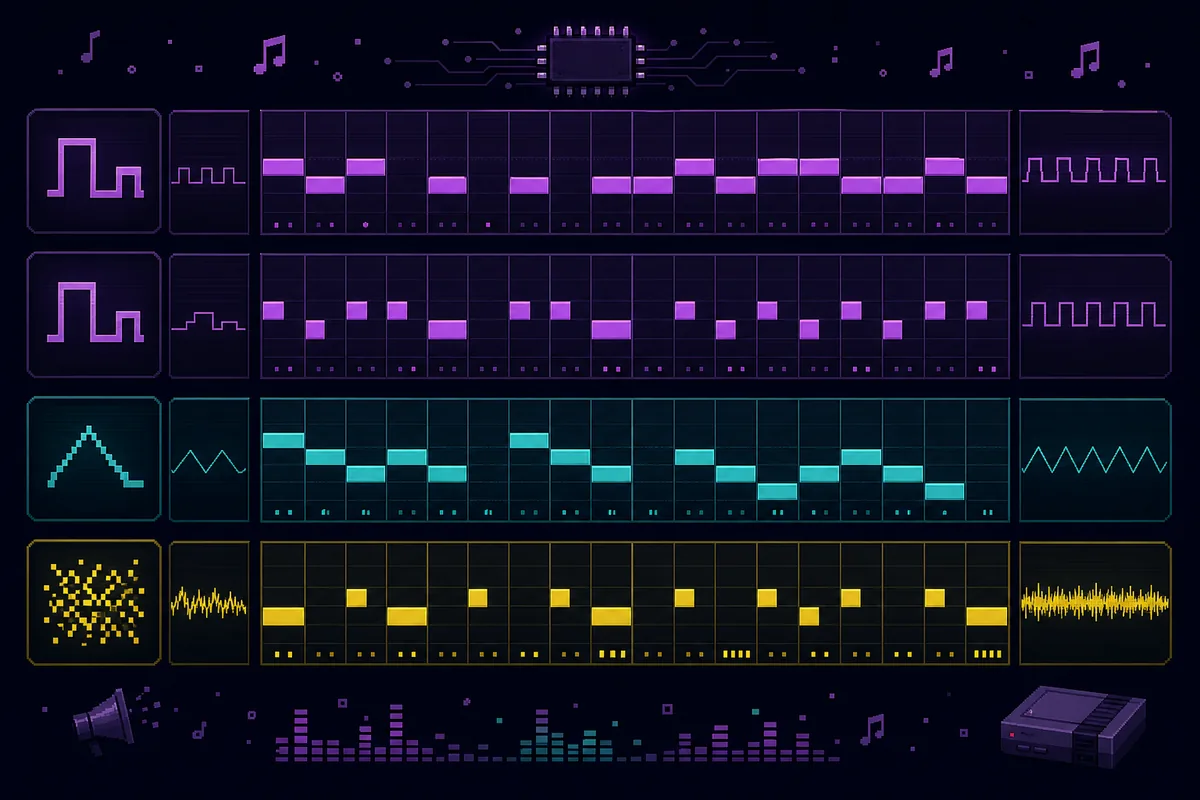
A convincing Game Boy chiptune arrangement can begin with four UltraBox lanes: pulse 1 for the main melody, pulse 2 for harmony or arpeggios, a custom wave for bass, and noise for drums. Keep the voices mostly monophonic, use short envelopes, and let each channel take turns becoming busy. The hardware identity comes as much from what you leave out as from the waveform you choose.
Starter Template
Pulse 1: lead melody. Pulse 2: counter-melody or fast chord arpeggio. Wave: bass or a softer lead color. Noise: kick, snare, hi-hat, and fills made from different noise lengths and pitches.
What the Game Boy Sound Chip Gives a Composer
The original Game Boy audio system exposes four channels with different strengths. Two channels generate pulse waves, one plays a small programmable waveform, and one generates noise. One pulse channel also has a frequency-sweep feature. The important writing lesson is not the register list; it is the division of labor. Melody, harmony, bass, and percussion must share a very small sound budget.
| Game Boy role | Useful musical job | UltraBox starting point | What to avoid |
|---|---|---|---|
| Pulse channel 1 | Main melody, bends, short effects | Bright pulse or square tone with a short envelope | Wide unison, long reverb, thick chords |
| Pulse channel 2 | Harmony, response phrase, arpeggio | Contrasting pulse width or octave | Copying the lead note-for-note throughout |
| Programmable wave | Bass, rounded lead, special timbre | Small custom waveform with controlled low end | Large sub-bass layers or constantly changing timbre |
| Noise channel | Drums, impacts, transitions | Short bright ticks, medium snares, darker kick bursts | Full acoustic drum kits that overpower the chip voices |
This is a stricter target than general 8-bit music. The broader guide to instruments used in 8-bit music compares several console palettes. Here, the boundary is specifically the Game Boy sound chip and a workflow that remains manageable inside UltraBox.
Set Up a Game Boy-Inspired UltraBox Project
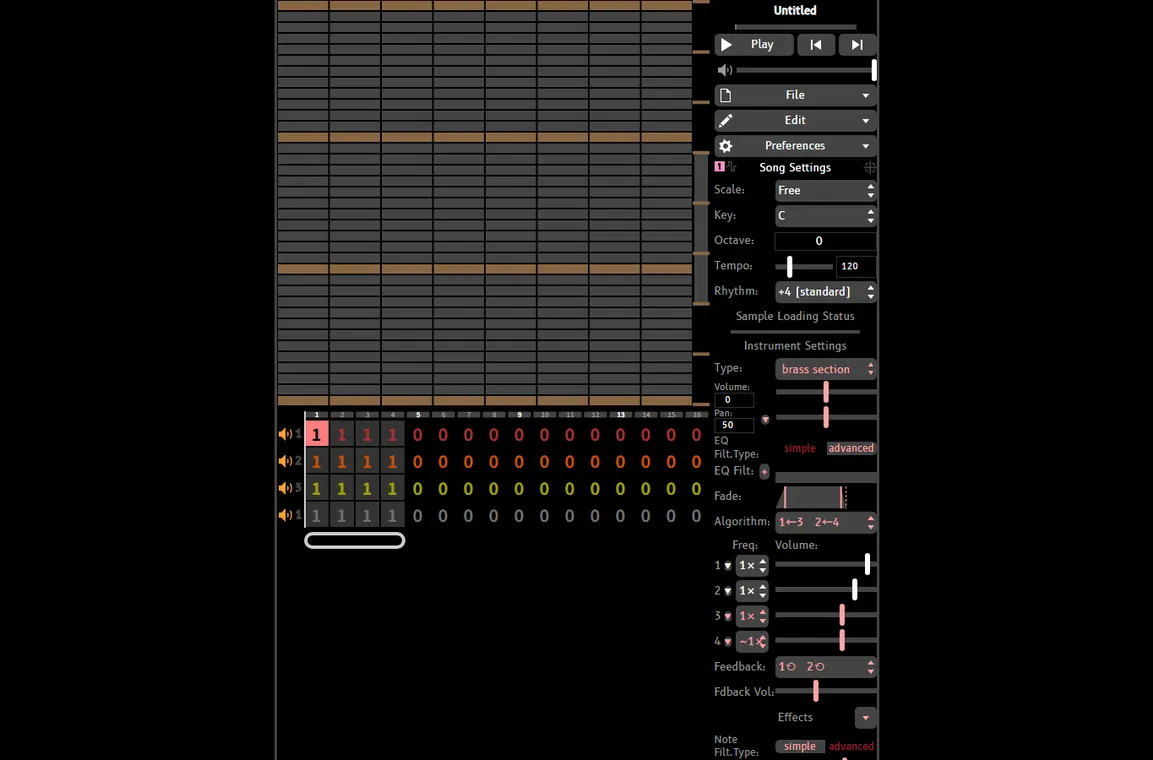
Open UltraBox and begin with four clearly named channels. You do not need to delete every extra feature from the editor; you need a rule for when each feature is allowed. Make the first complete loop with only the four core roles. Add a fifth channel later only if it solves an arrangement problem such as a short transition, a non-overlapping effect, or a deliberate modern layer.
- Create the lead pulse. Choose a simple pulse-style instrument. Test two pulse widths or closely related timbres and select the one that keeps the melody readable at low volume.
- Create the support pulse. Give it a different octave, pulse color, or note length. It should answer the lead, outline chord tones, or fill gaps.
- Create the wave bass. Start with a compact custom wave and short notes. Follow roots and fifths before writing a busier bass line.
- Create the noise kit. Use very short noise for hats, a longer burst for snare, and a lower or descending hit for kick emphasis.
- Save the editable source early. Keep the song URL or project data before experimenting. The UltraBox saving guide explains the available backup methods.
Write an Eight-Bar Game Boy Chiptune Loop
Start with one musical idea that can survive a plain pulse wave. A strong hook is usually more important than advanced synthesis. Write four bars that establish the phrase, then four bars that answer or vary it. Leave small rests so the second pulse channel and noise fills have somewhere to speak.
Bars 1–2: Establish the hook
Use pulse 1 for a short, singable motif. Let the wave channel play simple bass roots on the strong beats. Keep the noise pattern sparse: a kick-like hit at the start, a snare-like burst later, and tiny hat ticks only where they improve the groove.
Bars 3–4: Answer without adding a new section
Change the final notes of the melody, let pulse 2 answer in the gaps, or introduce a rapid three-note arpeggio. If both pulse channels are constantly active, mute one for half a bar. That small absence makes its return feel like a real arrangement event.
Bars 5–8: Repeat with one controlled variation
Repeat the harmonic path while changing one element: move the lead up an octave, alter the pulse color, make the bass approach the next root, or add a short noise fill in bar eight. Do not change melody, bass, drums, and timbre simultaneously. Limited systems sound expressive because a small change is easy to hear.
How to Make the Result Sound More Like Game Boy Chiptune
Use pulse-width contrast as orchestration
The two pulse voices should not feel interchangeable. Give the lead a fuller tone and the support voice a narrower, more nasal tone, or reverse that relationship for a section. Timbre contrast lets listeners separate parts even when both occupy a similar register.
Let the wave channel define the low end
The programmable wave channel is a better Game Boy-specific bass reference than the triangle-like bass commonly associated with NES music. Keep its contour simple and check it on small speakers. If the bass becomes a huge modern sub, the track may still sound good, but it stops teaching you how the Game Boy palette works.
Build several drums from one noise voice
A noise channel becomes a kit through envelope, pitch, and duration. Bright short hits imply hats; longer textured hits imply snares; darker bursts or fast downward motion can reinforce kicks. Alternate these shapes instead of stacking them, because the original constraint gives you one noise channel at a time.
Prefer arpeggios and counterpoint to block chords
If a chord needs three notes, play them rapidly on one pulse channel or distribute the harmonic information between melody and bass. This keeps a channel free and creates the animated movement associated with many chip tracks. For a broader composition workflow, continue with the how to make chiptune guide after this hardware-focused setup.
Turn the Loop into a Full Track
A good loop is not yet a song. Build an intro by using only wave bass and a fragment of pulse 1. Bring in noise and pulse 2 for the main section. For a B section, change register or pulse color before changing the entire instrument set. Return to the original hook with a stronger bar-eight fill so the listener recognizes the structure.
| Section | Active roles | One useful change |
|---|---|---|
| Intro | Wave bass + lead fragment | Delay full noise drums for four bars |
| Main A | All four roles | State the clearest version of the hook |
| Variation B | All roles, but less continuous | Swap pulse emphasis or change octave |
| Return / ending | Main roles with a final fill | Resolve the bass and shorten the last note |
If the timeline keeps looping too soon, use the BeepBox song-length guide to extend bars and patterns without losing the original phrase. The goal is controlled repetition, not endless duplication.
Common Game Boy Chiptune Mistakes
- Using an NES triangle bass by default: that can make a good retro track, but the Game Boy reference is a programmable wave channel.
- Giving every pulse channel full chords: keep parts monophonic or use rapid arpeggios so the four-role illusion remains clear.
- Layering realistic drums under the noise kit: finish the noise groove first; add a modern accent only when you intentionally want a hybrid style.
- Applying heavy reverb to every voice: short, dry sounds preserve rhythmic detail and make channel handoffs easier to hear.
- Calling the project an emulator: UltraBox is a flexible music editor. This workflow imitates musical constraints; it does not guarantee hardware-accurate playback.
- Changing too much at once: vary one pulse color, fill, octave, or bass approach at a time so the arrangement remains legible.
FAQ
How many sound channels did the original Game Boy use?
Its audio system provides four channels: two pulse channels, one programmable wave channel, and one noise channel. Their different capabilities shape the familiar Game Boy music palette.
Can UltraBox make real Game Boy chiptune?
UltraBox can recreate the musical roles and many recognizable textures, but it is not a cycle-accurate Game Boy emulator. Treat this guide as a composition constraint and sound-design workflow.
Which Game Boy channel should play bass?
The programmable wave channel is a useful starting point because it can provide a rounder custom timbre that contrasts with the two pulse voices. It can also carry a lead or effect when the arrangement needs a different role.
Do I need LSDJ to write Game Boy-style music?
No. LSDJ is a well-known tracker for actual Game Boy workflows, but you can study the same four-channel discipline in UltraBox. Use hardware-focused tools when authentic playback and platform workflow are the primary goal.
Technical Sources
- Pan Docs: Game Boy audio — channel types, pulse sweep, programmable wave, and noise behavior.
- UltraBox source repository — official project code and release source.
- Official UltraBox editor — verify current instrument and editor behavior.
Build the Four-Channel Loop
Open UltraBox, assign the two pulse roles, wave bass, and noise drums, then finish eight bars before adding any extra channel.