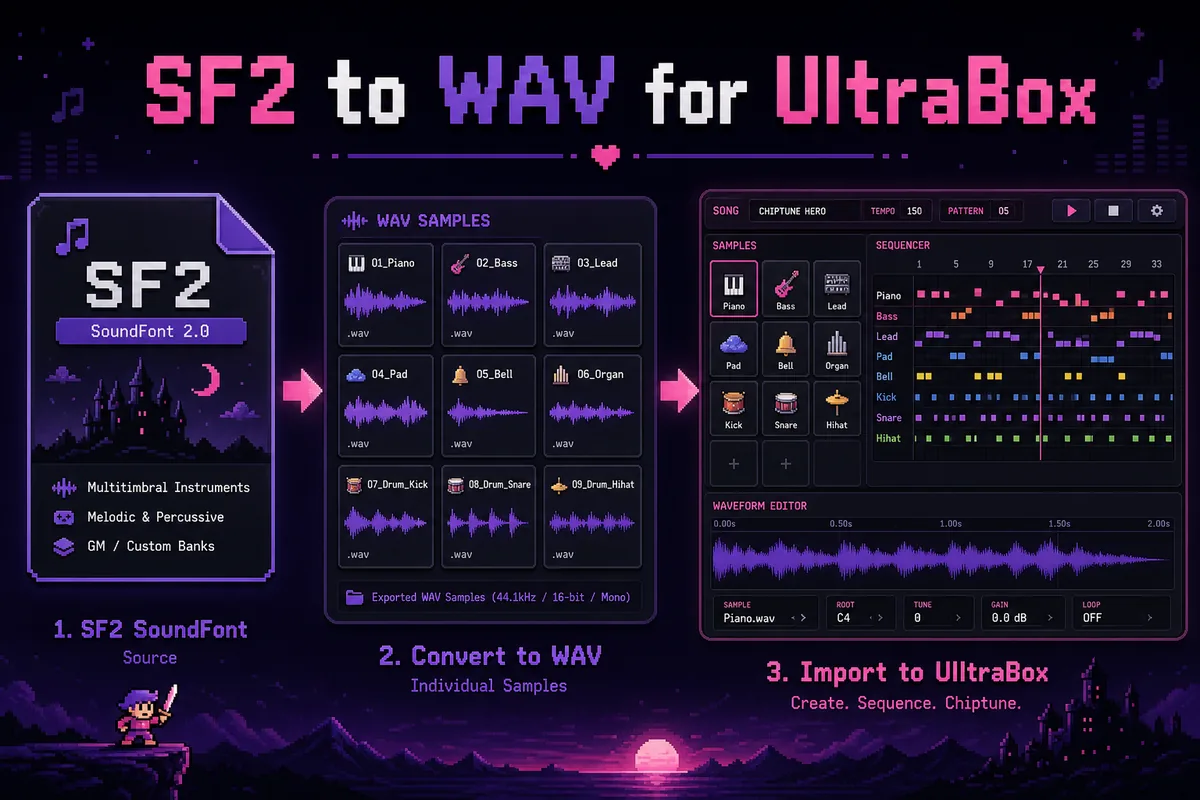
SF2 to WAV for UltraBox: Convert SoundFonts to Custom Samples
If you found a great SoundFont but UltraBox will not import the .sf2 file directly, the practical workflow is simple: extract the useful sounds as .wav files, host those files with direct CORS-friendly URLs, then add them as custom samples inside UltraBox.
Quick Answer
UltraBox does not use an SF2 file as a single instrument bank in the browser editor. Use the official UltraBox Sample Extractor to turn the SoundFont into individual WAV samples, upload those WAV files to a CORS-friendly host, and paste the direct sample URL into Edit > Add Custom Samples.
This page is intentionally narrower than the main UltraBox Sample Library overview. The samples page explains built-in libraries and the general custom sample system. This guide focuses on one specific job: taking a SoundFont, choosing the parts worth keeping, converting them into browser-friendly audio files, and avoiding the fetch errors that commonly happen when the final URL is wrong.
What UltraBox Actually Supports
A SoundFont is a container. It can include many instruments, velocity layers, drum hits, loop metadata, and samples bundled into one .sf2 file. UltraBox custom samples work differently: you provide one or more audio file URLs, and UltraBox loads those sounds into the editor as sample presets.
The official UltraBox FAQ explains that custom samples need to be uploaded first because UltraBox does not run its own file hosting server. It also notes that the URL should point to the sound itself and should end with an audio extension such as .wav or .mp3. That detail matters. A share page, preview page, or private file link may open in your browser but still fail when UltraBox tries to fetch it as audio.
Source
Start with an .sf2 file you are allowed to use. Prefer smaller, focused SoundFonts over huge all-purpose banks.
Conversion
Extract the useful instruments or drum hits into individual .wav files with the Sample Extractor.
Import
Host the WAV files, copy direct URLs, then add those URLs inside UltraBox's custom sample dialog.
The Complete SF2 to WAV Workflow
The cleanest workflow is to treat the SoundFont as raw material, not as the final asset. You do not need every instrument in a large SF2 bank. A chiptune arrangement usually benefits from a small, intentional palette: one bass, one lead, a pad or bell, and a few percussion hits.
Choose a focused SF2 file
Pick a SoundFont that matches the track you are making. For retro game music, a compact SNES-style, GM drum, piano, choir, or orchestral hit SoundFont is easier to manage than a massive multi-gigabyte library. Before using it in a public song, check the license. A file being easy to download does not automatically mean the samples are free for commercial use.
Open the UltraBox Sample Extractor
Open the official Sample Extractor and drop your .sf2 file into the page. The tool is designed for exactly this use case: taking larger files with multiple sounds, including SoundFonts, and exporting individual WAV files for UltraBox songs.
Select only the samples you need
If the extractor shows dozens or hundreds of entries, resist the urge to export everything. Select the notes or instruments you will actually use. A smaller custom sample set loads faster, is easier to organize, and creates fewer broken links later. For melodic instruments, test a few pitches from the useful range rather than every possible note.
Export WAV files or a ZIP archive
Export individual WAV files when you only need one or two sounds. Export a ZIP when you are pulling a small kit or instrument group. If the extractor offers instrument names, enable them so the file names are readable after download. Clear names such as sf2-piano-c4.wav and sf2-kick-tight.wav are much easier to debug than anonymous numbered files.
Prepare the WAV samples before hosting
Trim long silence, remove duplicate files, and keep sample names lowercase with hyphens. For most UltraBox work, mono WAV files are easier to mix and load. A 44.1 kHz sample rate is a practical default, especially because the extractor documentation notes resampling behavior for several input formats. If a sample is only a quick attack, do not leave ten seconds of tail unless the tail is musically necessary.
Host the files and import them into UltraBox
Upload the WAV files to File Garden, GitHub Pages, Dropbox direct links, or another host that returns CORS-enabled audio files. Copy a direct URL that ends in .wav. In UltraBox, open the Edit tab, scroll to Add Custom Samples, paste the URL, and confirm. If everything is configured correctly, UltraBox reloads and the sample becomes available in the preset list.
Sample Extractor Settings That Matter
The Sample Extractor is intentionally lightweight, but a few settings can change the result. The most important choice is whether to resample. Resampling can make files more consistent, but it can also hide the original character of a quirky sample. For most users, a consistent 44100 Hz output is a good starting point. If you are deliberately chasing a crunchy or archival sound, keep a copy of the original export so you can compare.
Exporting a ZIP is useful for organization, not for UltraBox import. UltraBox still needs the extracted audio files after you unzip them and host them. Do not paste a ZIP file URL into the custom sample dialog expecting UltraBox to unpack the archive. Use direct links to the final audio files.
| Choice | Recommended default | Why it helps |
|---|---|---|
| Output format | WAV | Simple to inspect, loop, trim, and import as a direct audio file. |
| Sample rate | 44100 Hz | Good browser compatibility and sensible file sizes for chiptune work. |
| File naming | Instrument name plus pitch or role | Makes hosted URLs and broken sample reports easier to understand. |
| Selection size | Small curated set | Faster loading, fewer links, and a more coherent instrument palette. |
Hosting and Import Rules
Most UltraBox custom sample problems happen after conversion, not during conversion. The audio file may be fine, but the URL may not be loadable by the browser from UltraBox. For the online editor, the host needs to allow cross-origin audio requests. That is why the official FAQ points users toward CORS-friendly services such as File Garden and Catbox.
A good sample URL has three properties. First, it is public. Second, it points directly to the audio file, not a preview page. Third, it ends with the actual extension, such as .wav, .mp3, or .ogg. Open the URL in a private browser window before adding it to UltraBox. If you see a website interface, login prompt, permission error, or download button page, it is probably not the direct link UltraBox needs.
Important: Dropbox can work only when the link is converted into a direct file URL. The Sample Extractor documentation specifically notes the dl.dropboxusercontent.com domain for Dropbox-hosted samples. Normal sharing links are not always enough.
Common Problems and Fixes
UltraBox says the sample failed to fetch
This usually means the browser could not retrieve the file as audio. Test the link in a private window, confirm the file is public, and make sure the URL ends with the real file extension. If the host blocks cross-origin requests, move the sample to File Garden, GitHub Pages, or another service that sends permissive CORS headers.
The sample imports but sounds too loud, too quiet, or clipped
Normalize or gain-stage the WAV before hosting. SoundFonts vary wildly: one extracted sample may be quiet while another peaks near 0 dB. For layered UltraBox arrangements, leaving a little headroom is safer. Aim for a clear sample that does not clip when played with drums, bass, and effects.
The sample has a click at the loop point
Clicks usually come from loop boundaries that cut the waveform abruptly. Try a shorter sustain section, choose a smoother loop point, or use a sample that was designed to loop. For one-shot drums and effects, turn looping off instead of forcing a loop that does not naturally repeat.
The extracted folder is too large
Export fewer sounds. A SoundFont may contain many velocity layers and duplicate pitch zones. UltraBox does not need a full workstation-style bank for most songs. A tight set of expressive samples usually works better than a giant collection of files you will never use.
SF2 vs WAV vs Built-In UltraBox Samples
SoundFonts, WAV samples, and built-in UltraBox libraries each solve a different problem. SoundFonts are convenient archives. WAV files are the importable final assets. Built-in UltraBox samples are the fastest option when you want to write music immediately without managing external files.
| Option | Best for | Limitation |
|---|---|---|
| SF2 SoundFont | Finding a large source bank with many instruments or drum hits. | Needs extraction before practical UltraBox browser import. |
| WAV sample | Direct UltraBox custom sample workflow after hosting. | Requires a public CORS-friendly direct URL. |
| Built-in UltraBox samples | Fast sketching with no upload, hosting, or licensing uncertainty. | Less personal than a curated custom sample set. |
Recommended Internal Workflow
For a real project, keep three folders: source-sf2, exported-wav, and hosted-samples. The source folder preserves the original SoundFont and license note. The exported folder contains raw WAV output from the extractor. The hosted folder contains only the cleaned, renamed files you actually upload. This small habit prevents confusion when you revisit a song months later and need to replace a broken URL.
After importing, save a test UltraBox song URL with only the new sample and a few notes. If that minimal test works, use the sample in your full track. If it fails, you can debug the sample without the complexity of a finished arrangement.
If your next step is exporting song data, read the Audio to JSON for UltraBox guide. It explains how the hosted sample URL is stored as a reference in UltraBox song JSON, why the audio itself should remain a hosted file, and how to keep custom sample links stable when sharing songs.
Sources checked on May 14, 2026: the official UltraBox Sample Extractor, the UltraBox FAQ, and the public UltraBox GitHub organization. Hosting behavior can change, so always test direct sample URLs before relying on them in a shared song.
FAQ
Next step: if you want a broader overview of built-in libraries, hosting choices, and non-SF2 custom audio, read the UltraBox Sample Library & Extractor page. If you are ready to compose, open UltraBox and test one imported sample before building a full arrangement.